
From RaceBox to TrackStat: the complete GPS workflow
Set up the GPS once, record a whole session hands-free, then split it into clean per-rep files ready to import — every step from the track to your splits.
A 25 Hz RaceBox gives you a velocity trace good enough to read split-by-split race speed — but only if the data comes off the device clean. The good news: you set the device up once, then every session is the same three moves — record, download, clean. This walks through all of it, from the app settings you set on day one to the moment your splits appear in TrackStat.
The whole loop is: set up the app → record the session → save and upload → download the CSV → clean the reps → import to TrackStat. Once you’ve done it once it takes a couple of minutes a session.
1. Set up the app (once per phone)
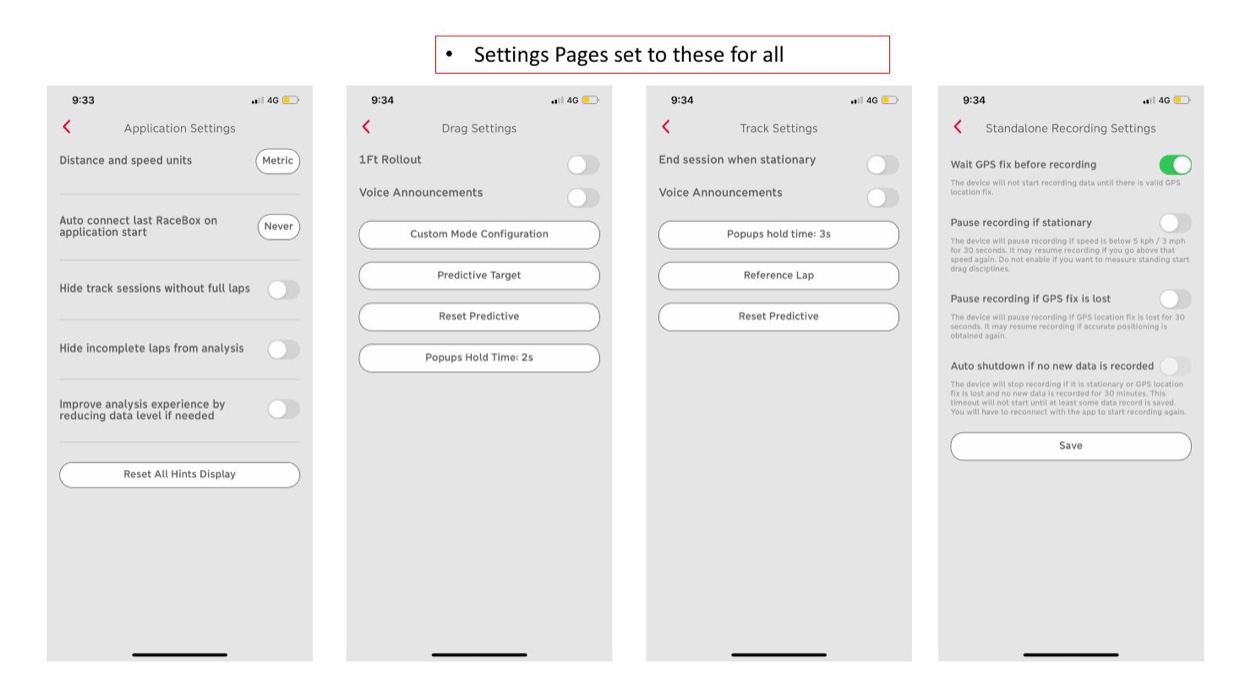
Open the RaceBox app and match two settings pages. You only ever do this once.
- Application Settings — set units to Metric.
- Standalone Recording Settings — turn “Wait GPS fix before recording” ON, and leave everything else OFF, then Save.
The one that matters most is “Pause recording if stationary” — it must stay off. If it’s on, the device stops logging whenever the athlete is standing still, which quietly eats the on-your-marks period before a rep. That still moment is exactly what the Rep Cleaner uses to find first movement — and it’s the whole point of a standing start.
2. Record the session
At the track, before the warm-up, get the device recording and then forget about it.
- On the Devices tab, tap Connect.
- Wait for the satellites. Give it a few minutes and watch the status line — you want around 0.5 m accuracy and 10+ satellites before you start. This is what makes the 10 m splits trustworthy later; rush it and every number downstream is softer.
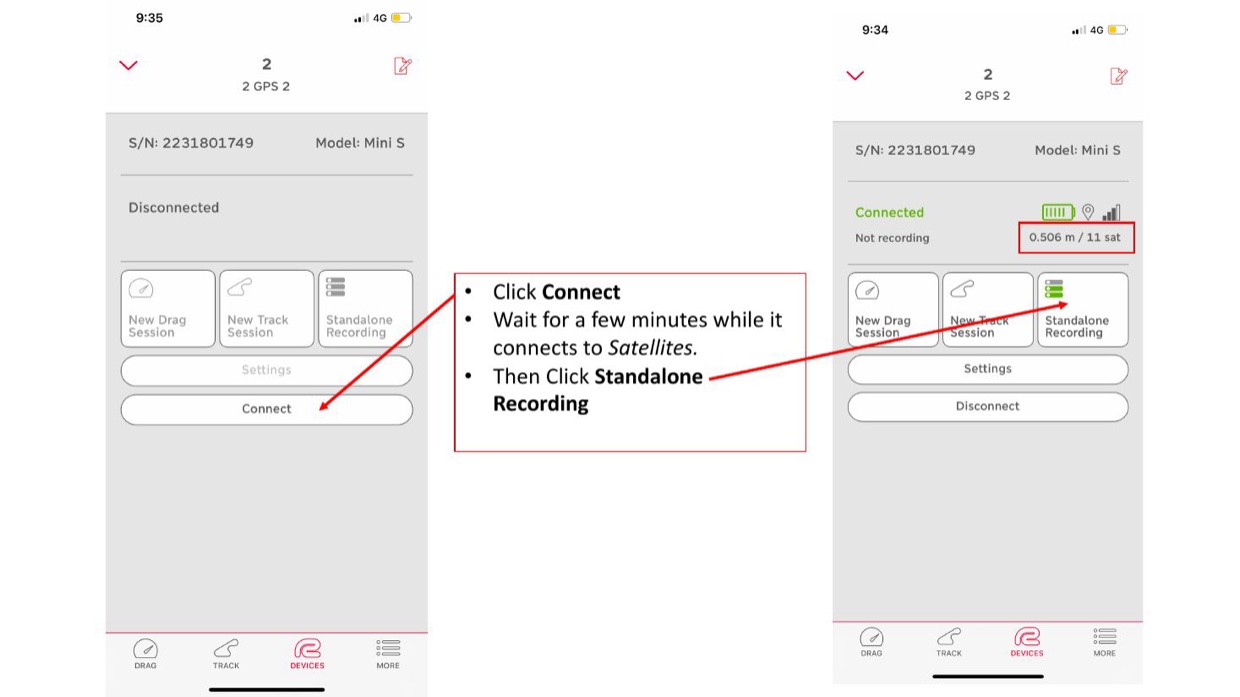
- Open Standalone Recording, and Erase All Memory first so you start clean.
- Tap Start Recording, then Disconnect. Close the app and put the phone away.
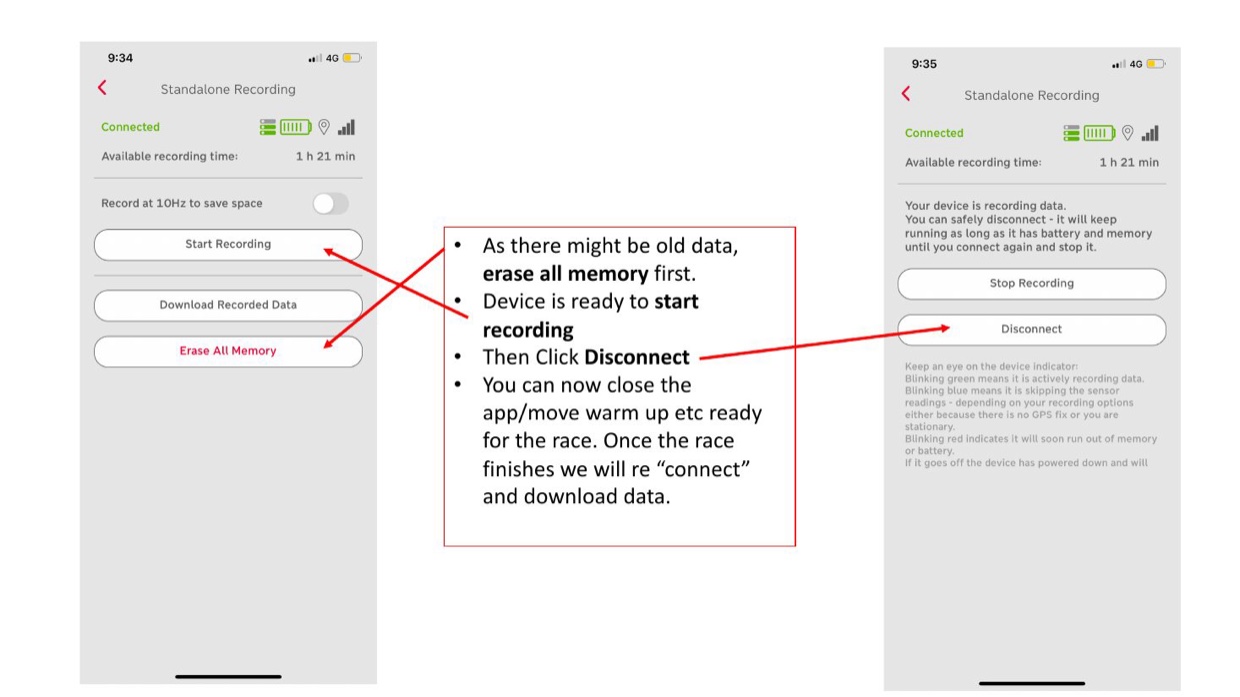
Leave it running for the whole session. Warm-up, walk-backs, standing around between reps — all of it is fine. The device keeps logging on its own battery and memory, and a blinking green light means it’s recording. You’ll split the actual reps out afterwards, so there’s no need to start and stop it around each effort.
3. Save and upload
Once the session’s done, reconnect and pull the data off the device.
- On the Devices tab, Connect again, then Stop Recording.
- Tap Download Recorded Data and let the transfer finish.
- In Downloaded Sessions, open the ⋮ menu (top right) and choose Process all as Track Sessions, then Save Without a Track.
- Tap Save. If it warns you about erasing or unprocessed data, you can cancel the erase — the session is already saved.
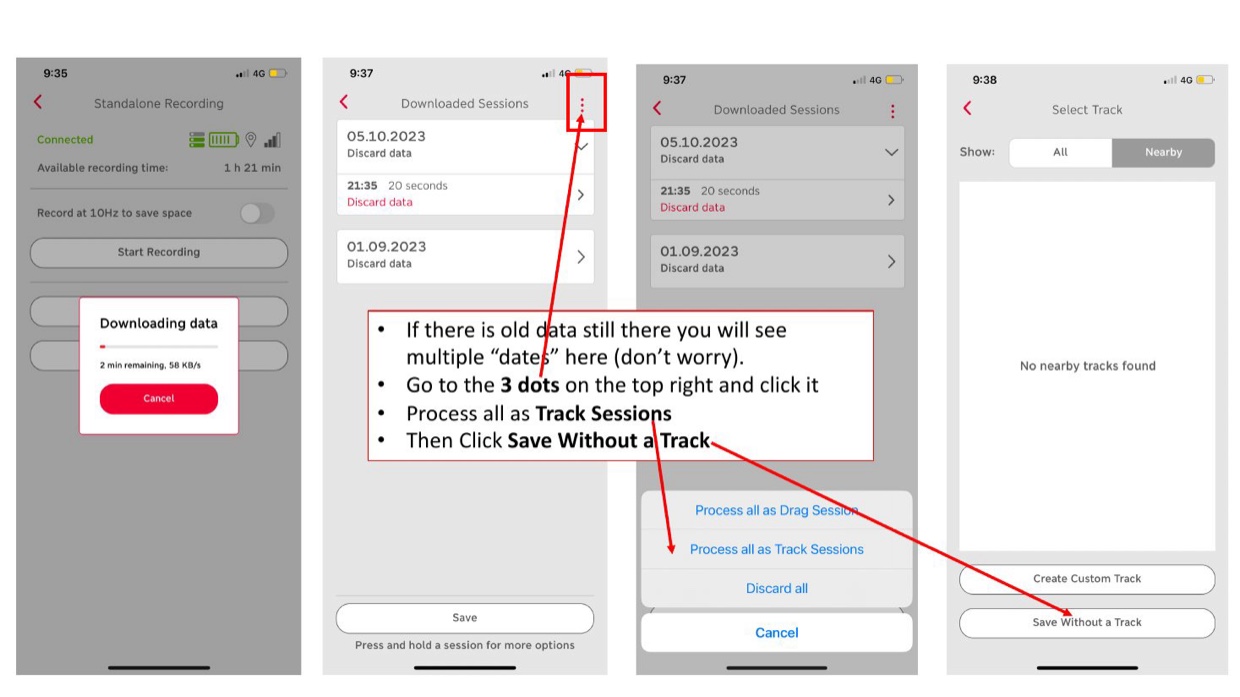
The session now lives in the Track tab and syncs to the RaceBox cloud, ready to export from a computer.
4. Download the CSV
On a computer, sign in at racebox.com and open the Track Sessions tab under your account.
- Find your session by its date and start time.
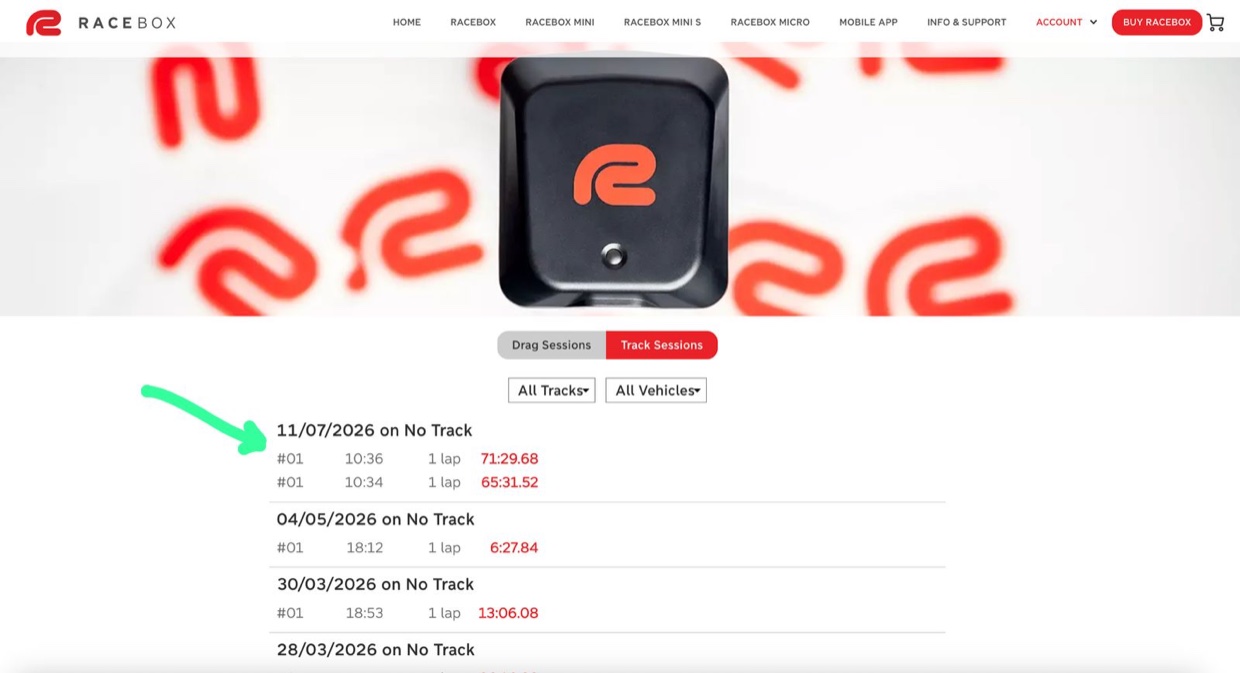
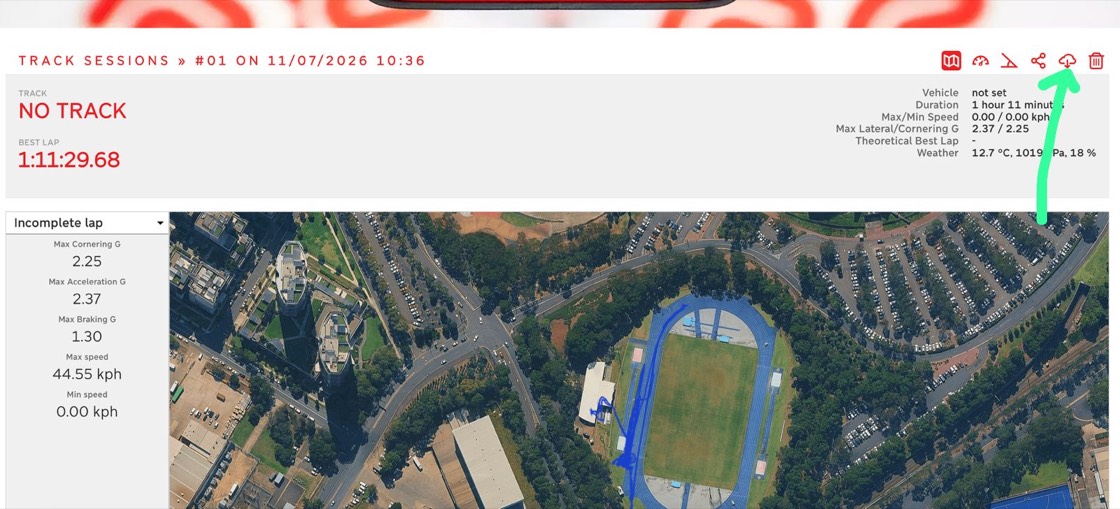
- Open it and click the download (cloud) icon in the toolbar at the top right.
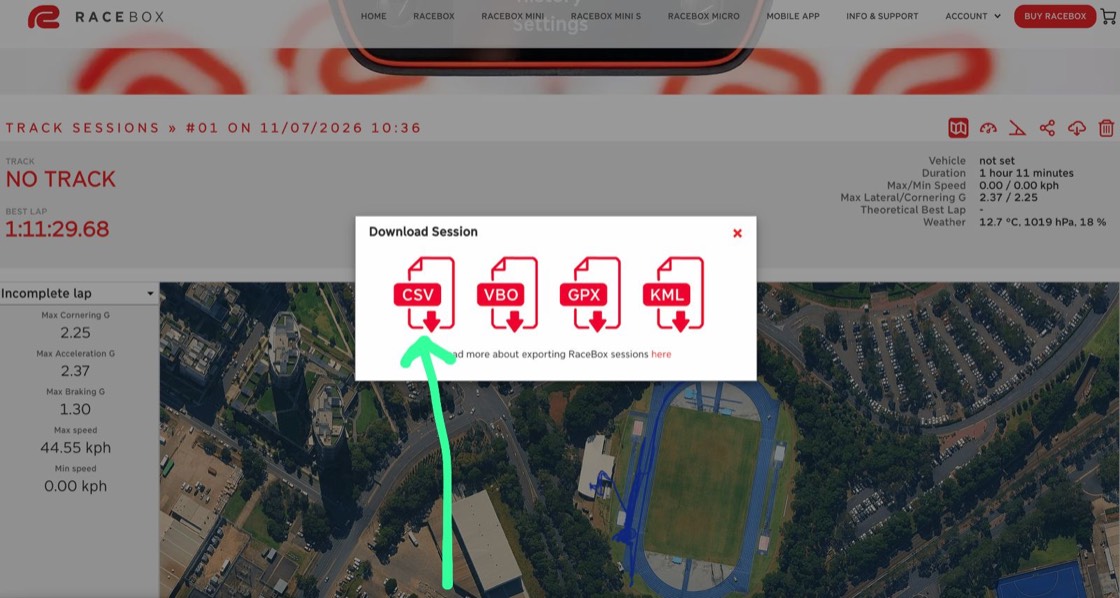
- In the Download Session box, choose CSV.
- On the Export Settings page, select Custom and set these exactly:
- Time column — Full Date/Time in local time zone
- Speed column — Meters/Second
- Altitude column — Meters
- New line — Windows
- All checkboxes (session description, entry/exit laps, bike mode) — left unticked
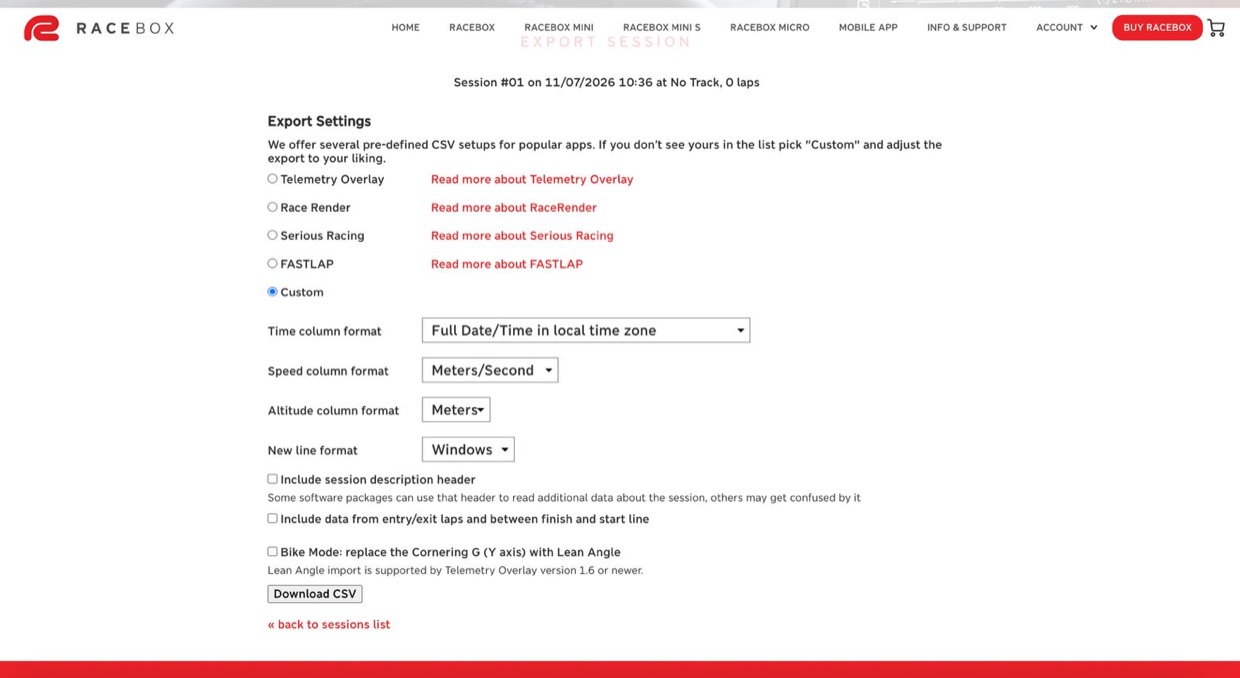
Then Download CSV. These aren’t arbitrary: the Rep Cleaner reads the full timestamps to work out the 25 Hz timing, and TrackStat expects speed in metres per second. Other formats either import wrong or won’t read at all.
One thing to be careful with: don’t open the CSV in Excel and save over it. Excel will happily overwrite the raw session with whatever sheet is on screen, and once the original is gone it’s gone. The Rep Cleaner reads the file without ever changing it, so there’s no reason to touch it by hand.
5. Clean the reps
The Rep Cleaner is a single web tool — it runs entirely in your browser, and nothing you drop into it leaves your computer.
- Drop the session CSV onto the page. It finds the reps automatically and numbers them along the session trace.
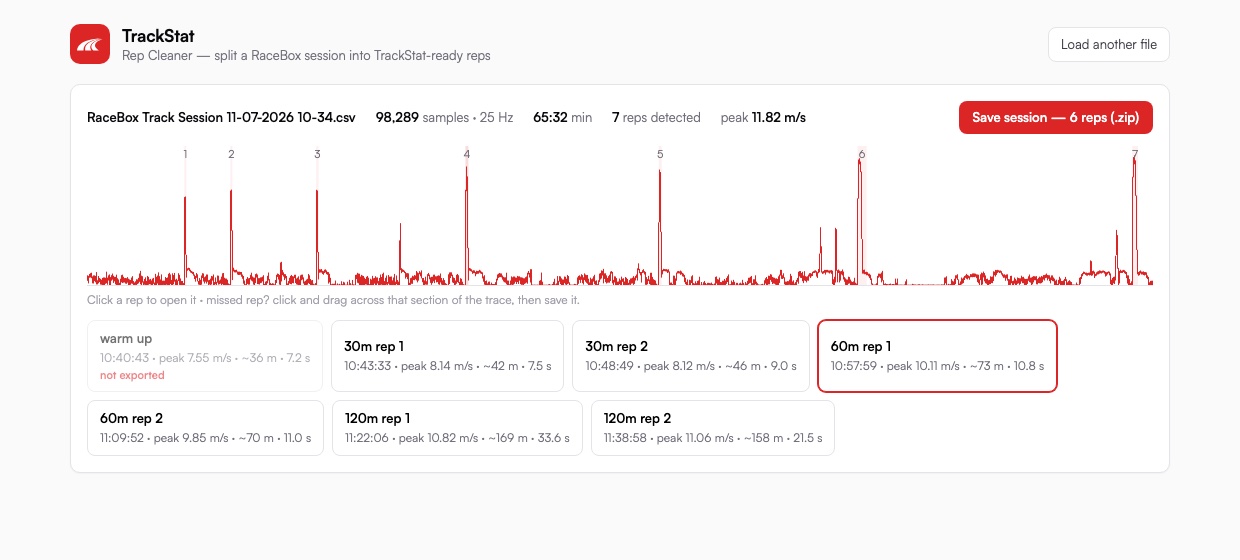
- Click a rep to open it. You get the speed and the vertical g-force on their own aligned charts, with the detected first movement marked. Down below, a zoomed view shows the g-force sitting flat while the athlete’s set, then breaking sharply — that break is the first step. If the mark’s slightly off, click the right point or nudge it a frame at a time.
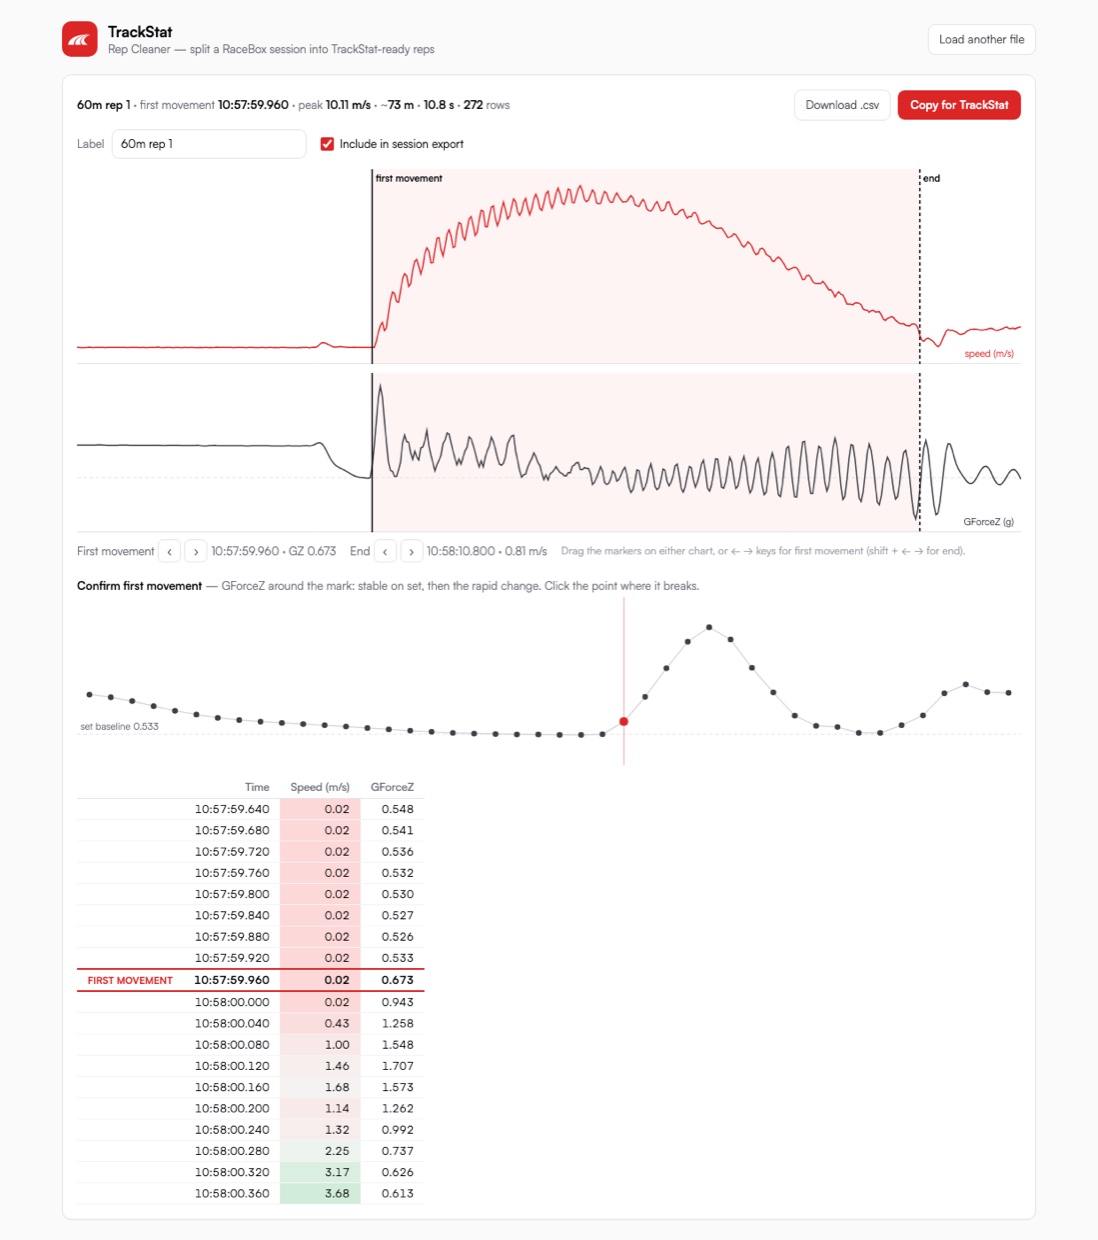
- Trim the end in if the rep caught too much roll-out, label each rep (30 m, 60 m, whatever it was), and untick Include in session export for the warm-up.
- Missed a rep? Click and drag across that section of the session trace and save it — it slots into the list in order, ready to edit like the rest.
- Export — either Copy for TrackStat on a single rep, or Save session to get every included rep as its own clean CSV.
6. Import to TrackStat
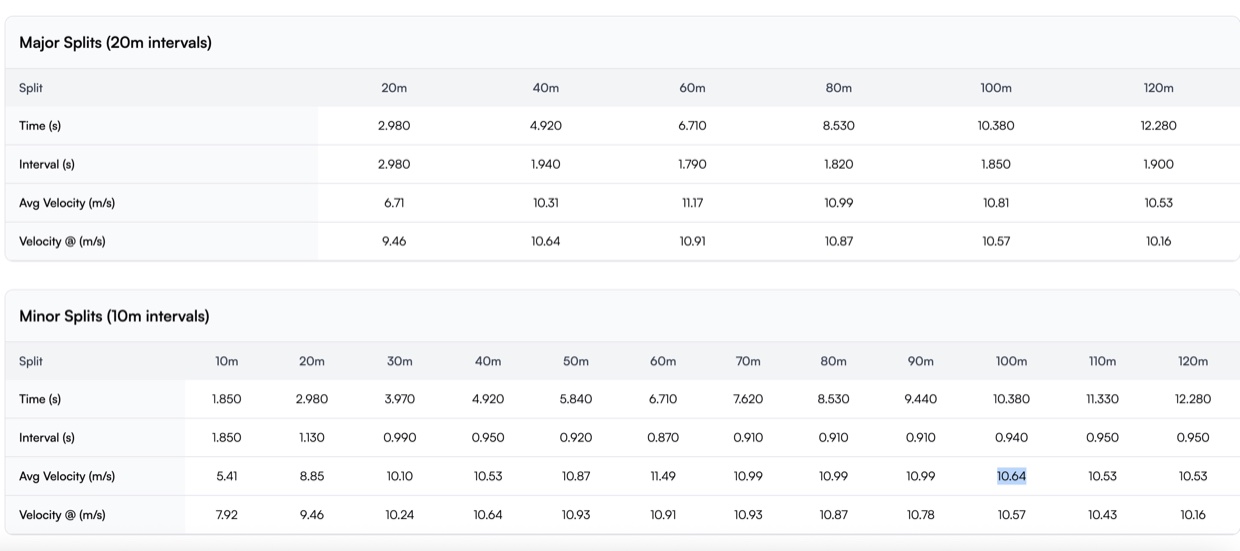
Open the athlete’s profile in TrackStat, go to the GPS tab, and start a new session. Paste the rows straight from the Rep Cleaner (or open one of the saved rep files and paste it in). TrackStat previews the run as you go — check the distance looks right, set your split intervals, and save.
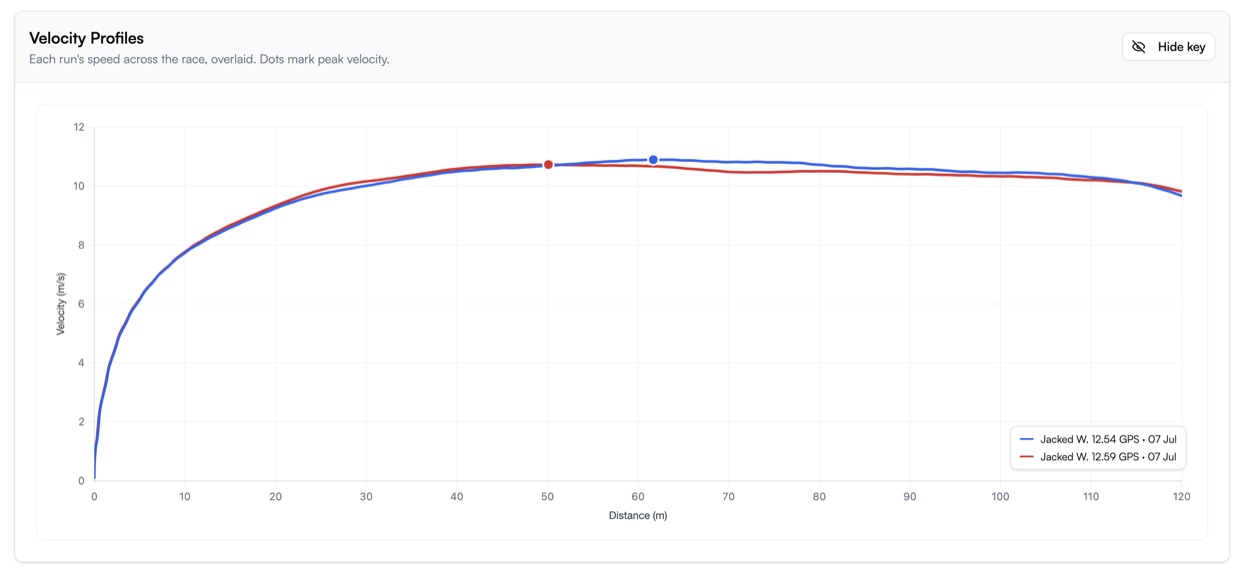
What you get out the other side is the reason for all of it: split-by-split speed at 10 and 20 m, velocity profiles you can lay over each other, and head-to-head comparisons across reps, sessions and athletes.
Quick checklist
- App set up once — Metric, Wait for GPS fix on, Pause-if-stationary off
- Waited for ~0.5 m accuracy and 10+ satellites before recording
- Recorded the whole session hands-free, downloaded and saved as a Track Session
- Exported Custom CSV — full timestamps, m/s, nothing ticked
- Split into clean reps and checked each first movement
- Imported to TrackStat for splits and velocity profiles
Get the setup right once and the rest is muscle memory — a couple of minutes between finishing a session and looking at the splits.